Organization Profile (Click here)
|
Customer Grouping (Click here)
|
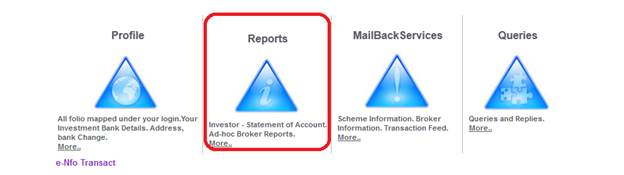
Reports (Click here)
|
WealthERP SetUp Check List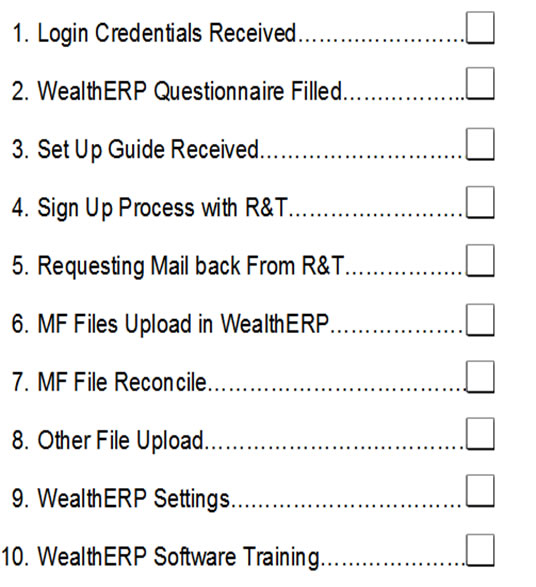
Login Credentials

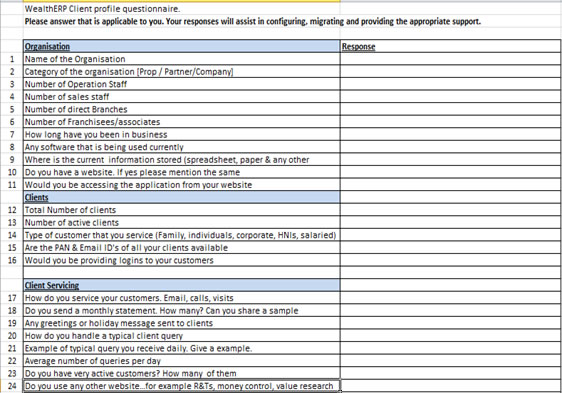
WealthERP Questionnaire
Set Up Guide
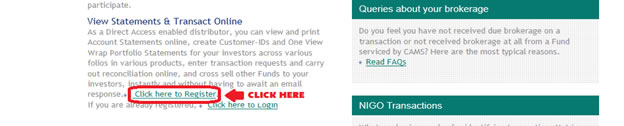
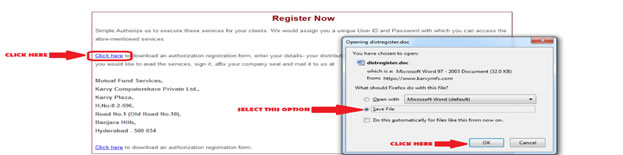
Sign Up process With R&T
CAMS

Karvy
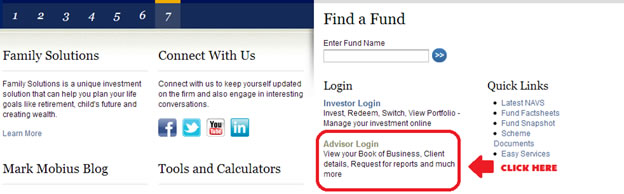
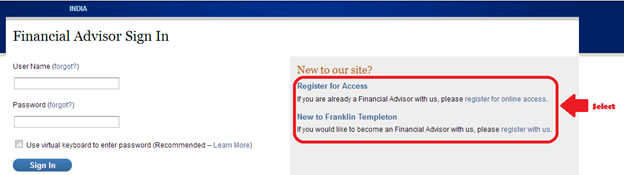
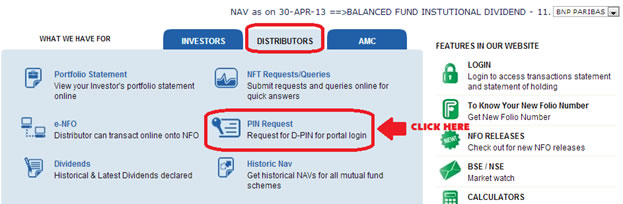
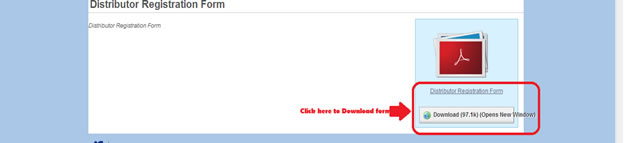
Franklin Templeton
Sundaram
Requesting Mail Back from R&T
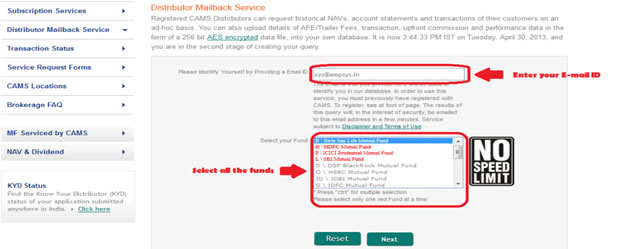
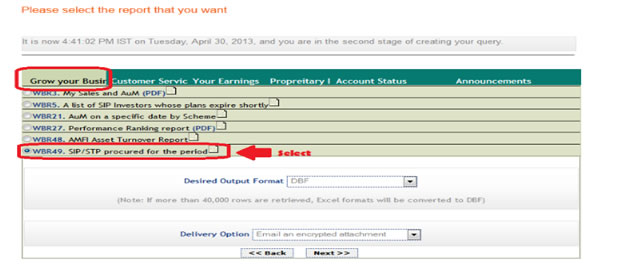
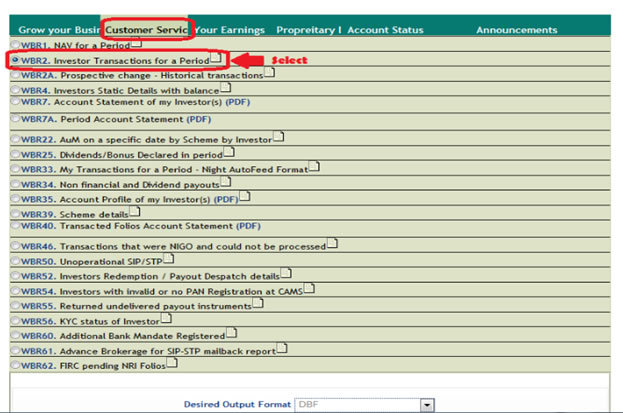
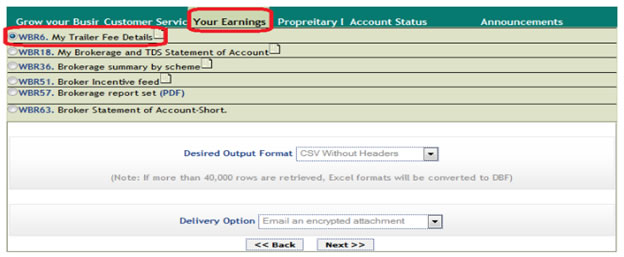
CAMS

Karvy
Franklin Templeton
Sundaram
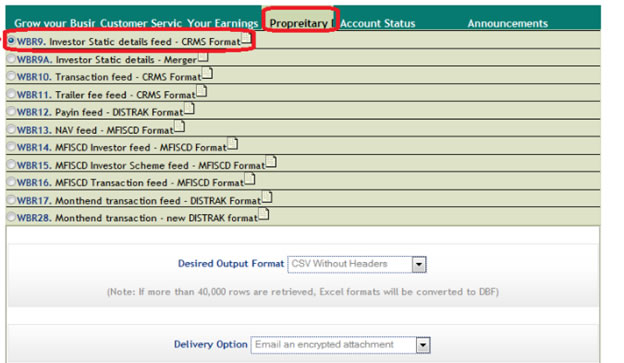
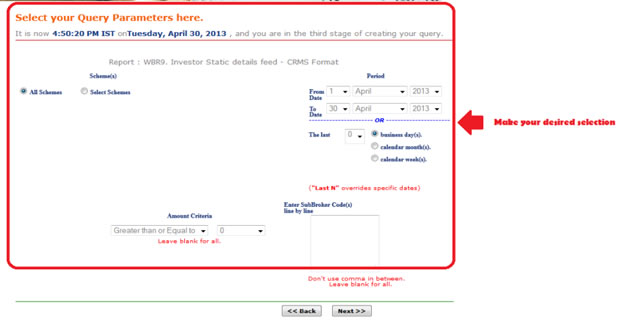
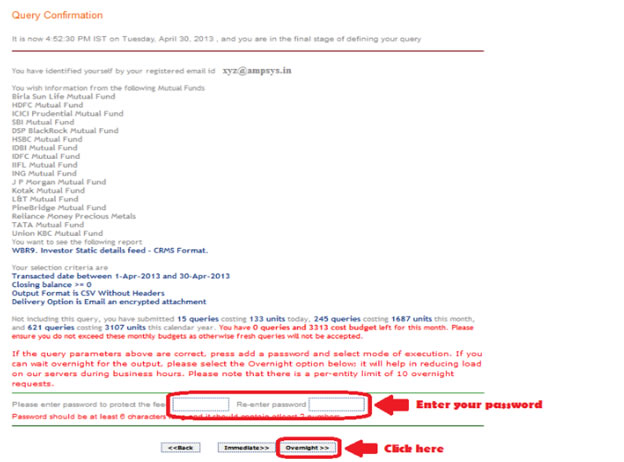
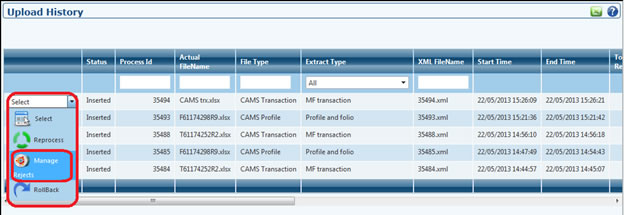
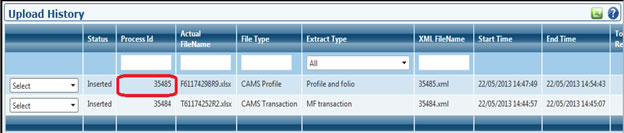
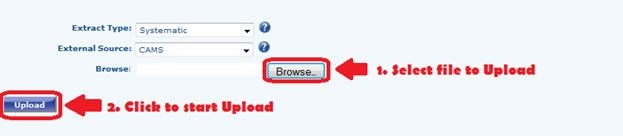
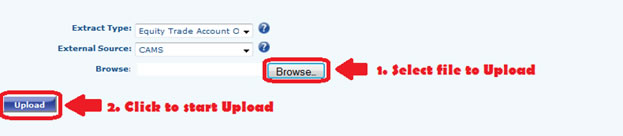
MF Files Upload in WealthERPARN Settings

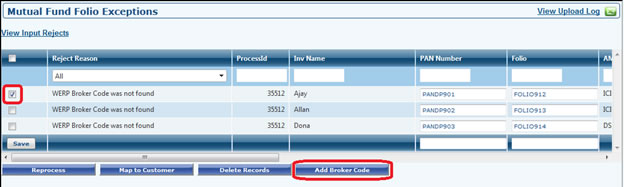
Reject Reasons
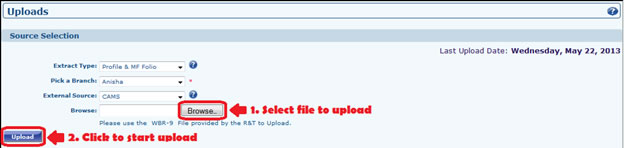
Folio/Profile UploadFolio Upload
Folio Cleansing/Exception Handling
Folio Reconcile

Profile Reconcile
NOTE: Repeat the above process for each R&T and all the files Transaction UploadTransaction Upload/Cleansing
Transaction Reconcile
Overall Upload ReconcileAUM Reconcile

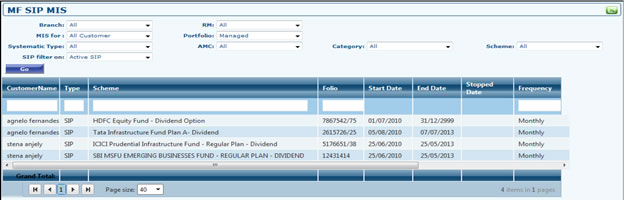
Other UploadsMF SIP Uploads
EQ Uploads

Change Login Id / Password


WealthERP SettingsTheme

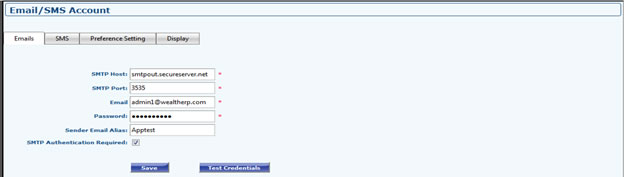
Email/SMS Account
Setup customer Category

Associate Category

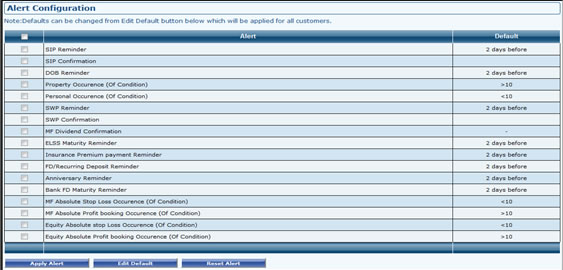
Alert configuration
Organization Profile

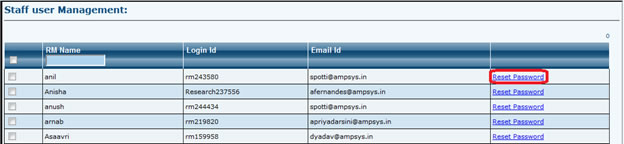
User ManagementStaff User Management
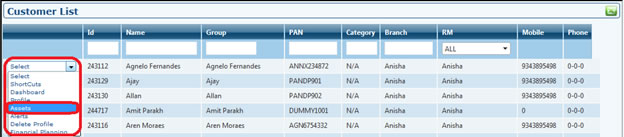
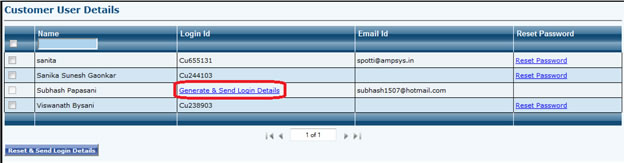
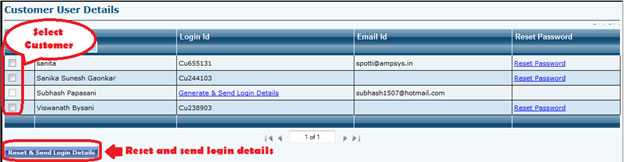
Customer User Management
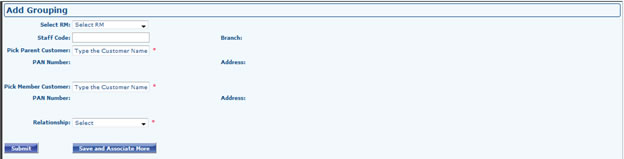
Customer Grouping

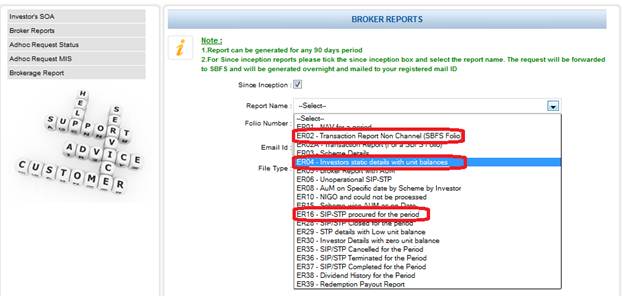
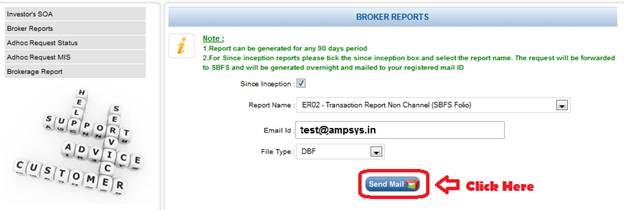
Reports
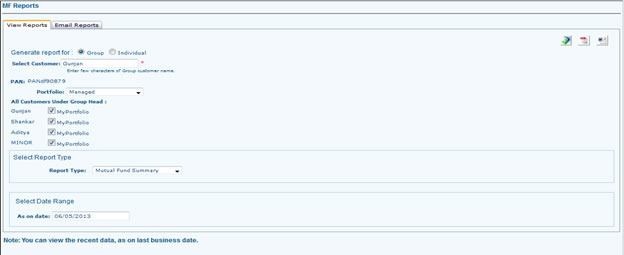
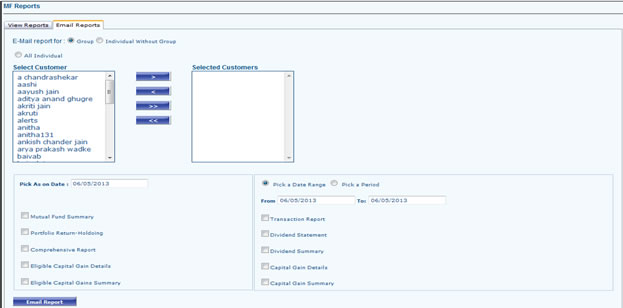
MF Reports
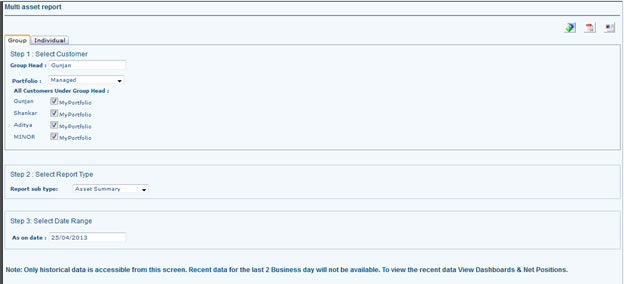
Multi Asset Reports
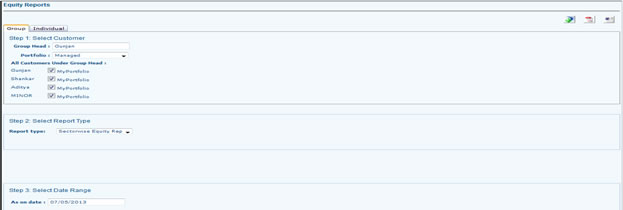
Equity Reports
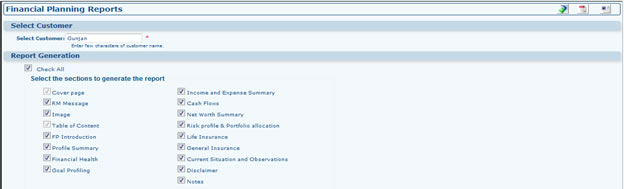
FP Reports
|
|---|